
.png.2f192d2207e45ed540f968e33a4e3d61.png)


jomoOSRS
-
Posts
200 -
Joined
-
Last visited
Content Type
Profiles
Forums
Articles
Calendar
Posts posted by jomoOSRS
-
-
In the latest news post about RuneFest 2025, Jagex and the RuneFest team noted "We’re delighted to announce that we’ll be hosting RuneFest at the NEC in Birmingham, UK on March 1st-2nd, 2025!
We’d like to thank you for your patience whilst we worked through the difficulties we shared with you in June’s RuneFest Update.
We will now be running RuneFest as an independent event and not in conjunction with Insomnia. We are no less ambitious about delivering an excellent value event with all the stunning immersive experiences and community atmosphere you would expect.
All existing tickets will transfer automatically (meaning you don’t need to do anything) to the new dates, and we’ll be selling an additional 1000 tickets (plus any others that we refund), meaning RuneFest will be bigger than ever! We expect these new tickets to go on sale later in the summer, and you’ll be given plenty of notice to get ready for it.
Any ticketholders who are unable to make the new dates will be able to claim a full refund. While we’d still love for you to join us, we know that logistically things may not work for some of you. For those of you who wish to claim a refund please log in here, with your order reference number and one of the qualifying verifications, then select the request refund option.
Please also note that as Insomnia will no longer be a part of RuneFest, this means that camping is no longer available. All camping tickets purchased will be automatically refunded.
We’ve updated our RuneFest T&Cs to reflect the change of dates and that RuneFest will no longer be running alongside Insomnia. You can find the updated RuneFest T&Cs here.
We’ve got some tips for those of you who can no longer attend but may have already made travel or accommodation arrangements:
- Check your bookings for refundable or flexible conditions
- Directly contact whoever you have your bookings with to see whether they may be able to do anything additional to help
- Consult your travel insurance terms (and contact them directly) to see whether anything regarding refunds or making changes to bookings is covered
- Some credit card providers offer travel protection, it’s worth contacting them to see whether they can help
Lastly we’d like to again apologise for the disruption caused, we appreciate that this has impacted many of your plans, and we really do appreciate you giving us the time to make RuneFest happen.
We’ll share more information about tickets and event details as soon as we’re able. Until then – we’re really looking forward to bringing our wonderful community together again in March 2025!
The RuneFest Team"

-
BIRMINGHAM, UK
MARCH 1 & 2, 2025
TICKETS COMING SOON! -
Any tips???
-
Wow! Good job, man!
-
🙂
just like your intro on your youtube videos. *epic animation* What's going on guys, my name is Theoatrix, and welcome to my UPDATED level 1-99 Hunter Guide! -
Actually, this is extremely helpful!
-
Epic video, man!
-
-
I'm gonna start posting again after my 2 day break lol
-
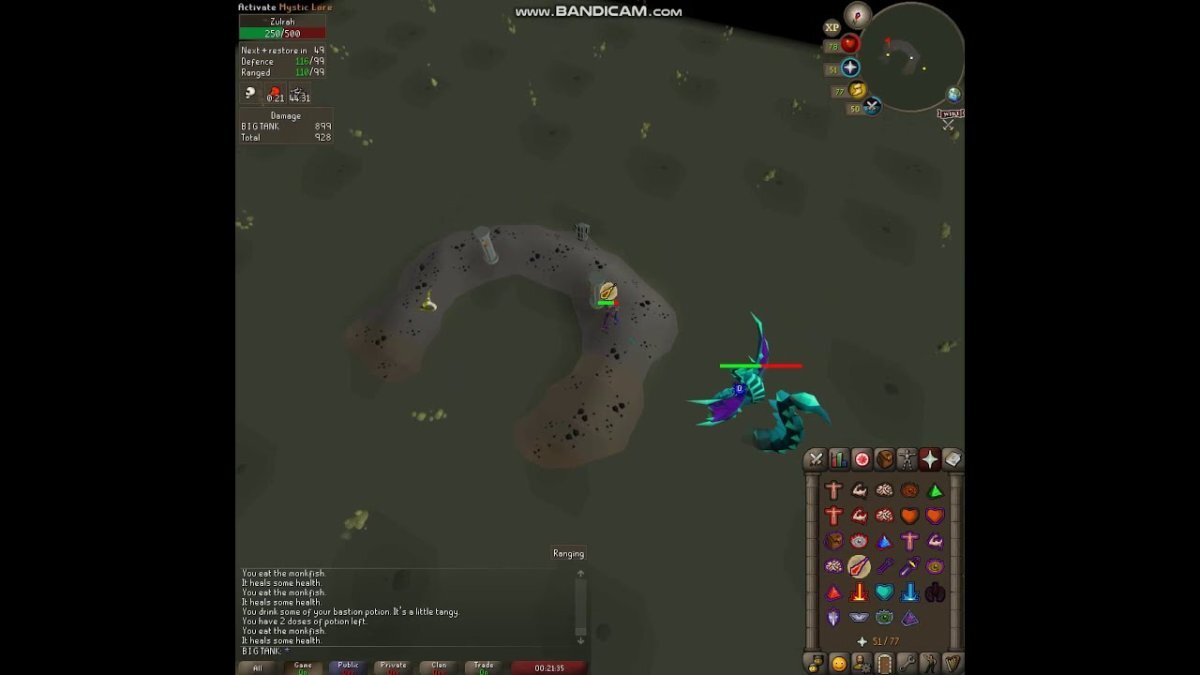
The story of B0aty's 1,000 Zulrah kills for a Tanzanite Fang is a testament to the dedication, perseverance, and sheer determination that embodies many Old School RuneScape (OSRS) players. B0aty, also known as Adam Lyne, is a well-known OSRS content creator and streamer, beloved by the community for his engaging personality and impressive in-game achievements.
In OSRS, Zulrah is a solo boss introduced in 2015, known for its challenging mechanics and valuable drops. Among these drops are the Serpentine Visage, the Magic Fang, and the Tanzanite Fang, the latter of which can be used to create the powerful blowpipe. The blowpipe is one of the most sought-after ranged weapons in the game due to its high damage output and versatility.
B0aty embarked on his Zulrah grind with the goal of obtaining the Tanzanite Fang, one of the more valuable and rare drops from the boss. While Zulrah is notorious for its unpredictable rotations and deadly attacks, B0aty, equipped with his knowledge of the game and adept PvM skills, was prepared for the challenge. However, what was supposed to be a routine grind for a specific item turned into an epic marathon that would be remembered by the OSRS community.
As B0aty began his Zulrah killing spree, he streamed his progress on Twitch, engaging with his audience and sharing his experiences. He initially approached the task with optimism, knowing that RNG (random number generation) would eventually favor him with the Tanzanite Fang. But as the kills mounted, the fang remained elusive. Despite using optimal gear, potions, and strategies, the RNG gods seemed to mock his efforts.
With each kill, B0aty's frustration grew, but so did his resolve. His community rallied behind him, offering support, encouragement, and humor to lighten the grind. The number of kills steadily climbed into the hundreds, with viewers eagerly tuning in to each stream, hoping to witness the moment when the coveted fang would finally drop.
As the kill count reached 500 and then 600, B0aty's journey became a saga. The grind was not just about obtaining the Tanzanite Fang anymore; it had turned into a test of endurance and mental fortitude. B0aty's streams were filled with moments of triumph and disappointment, and his reactions ranged from enthusiastic anticipation to comical despair. He maintained his signature positive attitude, entertaining his viewers even during the most tedious stretches.
The kill count continued to rise, reaching 800 and then 900. By this point, the story of B0aty's grind had spread throughout the OSRS community, turning his journey into a shared experience. Players and fans from all over tuned in to witness each new attempt, and the anticipation grew with each passing kill. The community's camaraderie was palpable, as everyone wanted to see B0aty succeed.
Finally, after what seemed like an eternity and on his 1,001st kill, the RNG gods smiled upon B0aty. The Tanzanite Fang dropped, ending his grueling journey. The moment was electric, filled with jubilation and relief. B0aty's reaction was a mix of disbelief and overwhelming joy, a testament to the emotional rollercoaster he had endured. His viewers erupted in celebration, sharing in his hard-earned triumph.
The story of B0aty's 1,000 Zulrah kills for a Tanzanite Fang became a legendary tale within the OSRS community. It highlighted not only the unpredictable nature of RNG in the game but also the resilience and determination of a player who refused to give up. B0aty's journey was a source of inspiration for many, illustrating that perseverance, a positive attitude, and community support can turn even the most daunting challenges into memorable achievements.
In the aftermath of his achievement, B0aty's saga was remembered and recounted by players as an iconic moment in OSRS history. It underscored the spirit of the game, where hard work, patience, and the camaraderie of the community are as valuable as the rarest in-game items. B0aty's grind for the Tanzanite Fang remains a shining example of the highs and lows that define the OSRS experience.
-
Exact’s Inferno speedrun is one of the most remarkable feats in Old School RuneScape (OSRS) history, showcasing extraordinary skill, precision, and strategy. The Inferno, added to OSRS in June 2017, is known as the most challenging solo PvM (Player vs. Monster) content in the game. It is a multi-wave fight culminating in a showdown with TzKal-Zuk, the toughest boss in Gielinor, and offers the Infernal cape as a reward for completion.
Exact, an OSRS player renowned for his exceptional PvM abilities, decided to take on the challenge of speedrunning the Inferno. The Inferno consists of 69 waves of increasingly difficult enemies, each requiring precise movement, prayer switching, and combat tactics to overcome. Completing it quickly requires not only an in-depth understanding of each wave but also perfect execution under pressure.
Exact's journey to the Inferno speedrun record was marked by rigorous practice and meticulous planning. He studied the spawn patterns, attack mechanics, and weaknesses of every enemy in the Inferno. By analyzing and optimizing his routes, gear, and inventory setups, Exact aimed to minimize the time spent on each wave while ensuring his survival.
One of the key aspects of Exact's strategy was his choice of equipment. He utilized the best gear available, including the Twisted Bow, which excels against high Magic level enemies, and high-tier armor that provided both defense and offensive bonuses. His inventory was carefully balanced between supplies like Saradomin brews for healing, super restore potions for maintaining prayer, and various special attack weapons to deal significant damage quickly.
Exact's preparation also involved honing his mechanical skills. The Inferno demands rapid and accurate prayer switching to mitigate damage from different types of attacks, precise movement to avoid getting cornered or trapped by enemies, and efficient use of special attacks to maximize damage output. Exact practiced these skills relentlessly, often streaming his attempts and sharing insights with the OSRS community.
On the day Exact set the speedrun record, everything came together perfectly. He executed his plan with near-flawless precision, showcasing incredible reaction times and decision-making skills. Throughout the 69 waves, Exact maintained a breakneck pace, dispatching enemies with stunning efficiency. His knowledge of the Inferno's mechanics was evident in his seamless navigation of each wave, often making split-second adjustments to adapt to the dynamic combat environment.
The culmination of Exact's speedrun was the final battle against TzKal-Zuk. This encounter is the ultimate test of a player's PvM prowess, requiring impeccable timing and coordination to handle both the boss and the additional enemies that spawn during the fight. Exact's execution during this phase was nothing short of masterful. He maneuvered around Zuk's devastating attacks, managed the healers effectively, and dealt consistent damage to the boss.
When the dust settled, Exact had completed the Inferno in an unprecedented time, setting a new world record for the fastest completion. His achievement was celebrated across the OSRS community, with players expressing admiration for his skill and dedication. The speedrun was not just a personal triumph for Exact but also a milestone in the history of OSRS, pushing the boundaries of what was thought possible in the game's most challenging content.
Exact's Inferno speedrun record highlighted the depth of skill and strategy that OSRS can offer. It inspired other players to attempt their own speedruns and to strive for excellence in PvM. The community recognized Exact not only for his incredible gameplay but also for his contributions to the collective knowledge and appreciation of high-level PvM content in OSRS.
Exact's journey to the Inferno speedrun record is a testament to the power of dedication, practice, and a deep understanding of game mechanics. It remains one of the most celebrated achievements in OSRS history, embodying the spirit of competition and mastery that drives players to continually push the limits of what can be accomplished in the world of Gielinor.
-
The Falador Massacre is one of the most infamous and memorable events in the history of RuneScape, occurring on June 6, 2006. It all began innocuously enough with a celebration for the accomplishment of Cursed You, a player who had become the first to reach level 99 in the Construction skill, newly introduced to the game. To commemorate this achievement, Cursed You decided to host a house party in his newly built player-owned house in Rimmington, inviting friends and fellow players to join in the festivities.
Construction, a skill that allows players to build and furnish their own houses, was a major update that brought new content and excitement to the game. As players gathered in Cursed You’s house to celebrate, the house party quickly became overcrowded. RuneScape’s servers struggled to handle the influx of players, causing lag and other technical issues.
During the party, Cursed You decided to use his house’s combat ring, an area where players could engage in PvP combat safely within the confines of his property. However, as more players joined and lag increased, an unexpected bug was triggered when Cursed You expelled everyone from his house. This bug allowed some players to retain the ability to attack others outside the designated PvP areas.
Upon being expelled from the house, several players found themselves in Falador, one of the major cities in RuneScape, with their PvP status still active. Confusion quickly turned to chaos as these players began attacking and killing unsuspecting bystanders. The streets of Falador, typically a safe zone, were suddenly filled with players attacking each other, leading to widespread panic and confusion.
The chaos was not limited to Falador alone. As word of the massacre spread, the affected players moved to other cities, including Edgeville, further spreading the mayhem. High-level players with powerful gear were able to kill others with ease, leading to significant losses of items and wealth for many victims.
The RuneScape community was in uproar. Forums and chat channels were flooded with reports and discussions about the massacre. Some players took advantage of the situation to exact revenge on enemies or simply to cause mayhem, while others tried to help by warning others to log out or avoid certain areas.
Jagex, the developers of RuneScape, quickly became aware of the situation. They promptly took action by temporarily disabling PvP combat in non-PvP areas and began identifying and banning players who had abused the glitch. However, the damage had already been done, and the event left a lasting impact on the community.
In the aftermath of the Falador Massacre, Jagex implemented several measures to prevent such incidents from occurring in the future. They fixed the underlying bug that allowed players to retain PvP status outside of PvP zones and improved server stability to handle large gatherings of players more effectively. Additionally, they enhanced their monitoring and response systems to detect and address similar issues more swiftly.
The Falador Massacre remains one of the most talked-about events in RuneScape’s history. It serves as a cautionary tale about the potential consequences of bugs and exploits in online games. The event also highlighted the unpredictable nature of player interactions and the importance of robust game design and community management.
Years later, the Falador Massacre is still remembered and discussed by players, both old and new. It has been commemorated in various ways, including in-game references and community events. The massacre’s legacy lives on as a reminder of a chaotic yet pivotal moment in the history of RuneScape, illustrating the dynamic and often unpredictable nature of massively multiplayer online games.
-
The "Loot from 10,000 Nex" Project is one of the most remarkable player-driven endeavors in the history of RuneScape. This monumental task was undertaken by a group of highly skilled players who aimed to defeat the boss Nex 10,000 times and meticulously document the loot they received. This project not only demonstrated exceptional dedication and teamwork but also provided invaluable insights into the game's mechanics and drop rates.
Nex, one of the most formidable bosses in RuneScape, was introduced with the release of the God Wars Dungeon's ancient prison. Known for her powerful attacks and complex battle mechanics, Nex posed a significant challenge to players. Defeating her required high levels of coordination, skill, and preparation. The players who embarked on the "Loot from 10,000 Nex" project were well aware of these challenges and were prepared to face them head-on.
The group consisted of experienced players who had honed their skills in various aspects of the game. They meticulously planned their strategy, optimizing their gear, inventory setups, and battle tactics to maximize efficiency. Each member had a specific role, whether it was tanking, dealing damage, or providing support. Their synergy and communication were crucial in ensuring consistent success in their encounters with Nex.
The project spanned several months, during which the group dedicated countless hours to slaying Nex. Each kill was carefully documented, recording not only the loot received but also the time taken and any noteworthy occurrences during the battles. This level of detail was essential for analyzing the drop rates and understanding the frequency of rare items.
The loot from Nex was highly coveted, with items such as Torva, Pernix, and Virtus armor pieces, as well as the Zaryte bow, being among the most sought-after rewards. These items were highly valuable both in terms of their in-game utility and their worth in the game's economy. By tracking the loot from 10,000 kills, the group aimed to provide a comprehensive overview of Nex's drop table, shedding light on the true rarity of these coveted items.
As the project progressed, the group faced numerous challenges. The sheer number of kills required immense perseverance and stamina. The intense battles against Nex demanded constant focus and adaptability, as even minor mistakes could lead to costly deaths and setbacks. Additionally, coordinating the schedules of multiple players to maintain a consistent killing pace was no small feat.
Despite these challenges, the group remained steadfast in their commitment. Their efforts were driven by a combination of passion for the game, a desire to contribute to the community's understanding of Nex, and the thrill of hunting for rare and valuable loot. The sense of camaraderie and teamwork that developed among the participants was a testament to the strength of the RuneScape community.
After months of relentless effort, the group finally reached their goal of 10,000 Nex kills. The data they collected provided a treasure trove of information for the RuneScape community. Detailed spreadsheets and analysis revealed the average drop rates of various items, the frequency of rare drops, and insights into the overall value of Nex's loot. This information was invaluable for players looking to engage with Nex, whether for profit or for the challenge of the battle.
The "Loot from 10,000 Nex" project left a lasting impact on the RuneScape community. It highlighted the incredible dedication and skill of the players involved, showcasing what could be achieved through teamwork and perseverance. The data collected from the project became a reference point for future Nex hunters, helping them set realistic expectations and plan their strategies accordingly.
Moreover, the project underscored the importance of community-driven initiatives in enhancing the collective knowledge and experience of the game. By sharing their findings, the group not only enriched their own gameplay but also contributed to the broader understanding of one of RuneScape's most challenging bosses.
In the years that followed, the "Loot from 10,000 Nex" project continued to be remembered as a remarkable achievement in RuneScape history. It exemplified the spirit of exploration, collaboration, and dedication that defines the RuneScape community. The legacy of this project lives on, inspiring future generations of players to undertake their own ambitious endeavors and push the boundaries of what can be achieved in the world of Gielinor.
-
Zezima, whose real name is Peter, is arguably the most iconic player in the history of RuneScape. Known for his unwavering dedication, exceptional skill, and legendary status, Zezima's journey in the game has become a part of RuneScape lore, inspiring countless players over the years.
Peter's adventure in RuneScape began in 2001, shortly after the game was released. Drawn to the expansive world and intricate gameplay, he quickly became immersed in training skills, completing quests, and exploring the vast landscape of Gielinor. His username, "Zezima," would soon become synonymous with excellence in RuneScape.
From the early days, Zezima displayed an extraordinary commitment to the game. He meticulously trained his skills, often setting benchmarks for other players to follow. His methodical approach and relentless pursuit of perfection saw him achieve milestones that were considered nearly impossible at the time. One of his most notable early accomplishments was becoming the first player to reach level 99 in multiple skills, including Cooking, Woodcutting, and Fishing. These achievements set him apart from his peers and established him as a dominant force in the game.
The peak of Zezima's fame came in the mid-2000s when he held the top spot on the RuneScape hiscores for an extended period. During this time, he became the first player to achieve 2277 total level, the highest possible at the time. This feat required immense dedication, as it involved reaching level 99 in every skill, a monumental task given the game's time-consuming training methods.
Zezima's dominance in the hiscores and his impressive array of achievements earned him a massive following. Players would flock to locations where he was known to train, hoping to catch a glimpse of the legend in action. His presence in the game was often met with awe and admiration, and he became a symbol of what could be achieved through dedication and hard work.
Beyond his skill achievements, Zezima was also known for his involvement in the community. He frequently interacted with fellow players, offering advice and sharing his experiences. His humble and approachable demeanor endeared him to many, further solidifying his status as a beloved figure in the RuneScape community.
As RuneScape evolved and new content was introduced, Zezima continued to adapt and excel. He participated in new activities, explored new areas, and remained a prominent figure in the game. His ability to stay relevant and competitive in a constantly changing environment demonstrated his deep understanding of the game mechanics and his passion for RuneScape.
In the years that followed, Zezima's activity in the game became less frequent as he pursued other interests and responsibilities outside of RuneScape. However, his legacy endured. He occasionally returned to the game to participate in events and reconnect with the community, each appearance sparking excitement and nostalgia among players.
Zezima's impact on RuneScape is immeasurable. He inspired a generation of players to strive for greatness, set ambitious goals, and approach the game with dedication and perseverance. His achievements and contributions to the community have left an indelible mark on the history of RuneScape, and his name continues to be revered by players old and new.
Today, Zezima remains a legendary figure in the RuneScape universe. His journey from a dedicated player to the most famous name in the game's history is a testament to the power of passion, commitment, and community. Zezima's story is not just about achieving high scores and reaching milestones; it's about the impact one player can have on an entire community and the enduring legacy that can be created through dedication and love for the game.
-
Start by completing the Druidic Ritual quest to unlock the Herblore skill. Collect grimy herbs from monster drops or purchase clean herbs from the Grand Exchange to start your training. Begin by making Attack potions (guam leaves and eye of newt) for levels 1-3, granting 25 XP per potion. Continue with Attack potions until level 5, then switch to Antipoison potions (marrentill and unicorn horn dust) for levels 5-12, providing 37.5 XP per potion. Progress to Strength potions (tarromin and limpwurt root) for levels 12-26, which give 50 XP each. At level 26, move to Energy potions (harralander and chocolate dust) until level 38, gaining 67.5 XP per potion. From levels 38-45, make Prayer potions (ranarr weed and snape grass) for 87.5 XP each, as they are profitable and popular in the market. Continue with Super attack potions (irit leaf and eye of newt) from levels 45-52, yielding 100 XP per potion. From levels 52-55, create Super energy potions (avantoe and mort myre fungus) for 117.5 XP each. Next, make Super strength potions (kwuarm and limpwurt root) from levels 55-63, providing 125 XP per potion. Transition to Super restore potions (snapdragon and red spiders' eggs) from levels 63-66, giving 142.5 XP per potion. Continue with Super defence potions (cadantine and white berries) from levels 66-72, which grant 150 XP each. Make Ranging potions (dwarf weed and wine of zamorak) from levels 72-81, yielding 162.5 XP per potion. At level 81, switch to Saradomin brews (toadflax and crushed bird nests) until level 85, providing 180 XP each. From levels 85-90, create Anti-venom potions (torstol and zulrah's scales) for 120 XP per dose (300 XP per potion). Finally, from levels 90-99, make Super combat potions (super attack, super strength, and super defence potions with a torstol), granting 150 XP per dose (600 XP per potion). For faster experience, consider doing Herblore at the Herbiboar minigame or participating in the Tithe Farm minigame, which provides additional Herblore XP rewards. Additionally, you can use the Tears of Guthix minigame to gain bonus XP in Herblore if it is your lowest skill. Utilize the daily Herblore challenges from the Wise Old Man in Draynor Village, and consider using skill lamps from quests or random events.
-
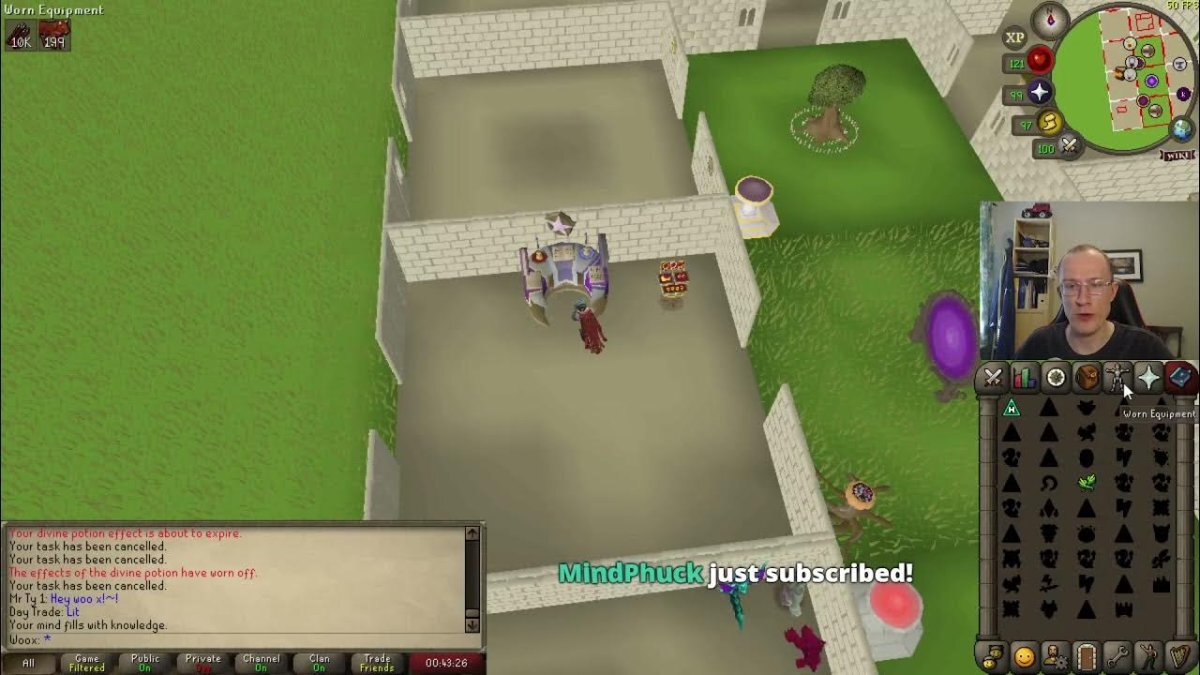
Woox, whose real name is Thomas, is a legendary figure in the world of Old School RuneScape (OSRS). Known for his exceptional skill, determination, and strategic prowess, Woox has become a household name among players for his incredible achievements and contributions to the game.
Thomas began playing RuneScape in his youth, initially drawn to the game's rich world and complex mechanics. His journey in OSRS began like many others, exploring quests, training skills, and engaging with the community. However, what set Woox apart was his relentless pursuit of mastery in every aspect of the game.
One of Woox's earliest claims to fame came from his innovative approaches to challenging content. He became known for completing difficult quests and activities in ways that seemed impossible to others, using unconventional strategies and meticulous planning. His ability to analyze game mechanics and find loopholes or optimal strategies became his trademark.
Woox gained widespread recognition in 2015 when he achieved the prestigious Completionist Cape in OSRS, a feat that requires completing all quests, achieving level 99 in all skills, and mastering various achievements. This accomplishment solidified his reputation as one of the most skilled players in the game.
One of Woox's most iconic moments came during the release of the Chambers of Xeric (Raids) in 2017. He stunned the community by achieving the world's first solo completion of Raids, a feat that was considered extremely challenging due to the raid's mechanics designed for group play. His meticulous planning, precise execution, and deep understanding of game mechanics allowed him to overcome seemingly insurmountable odds.
Following his solo Raids completion, Woox continued to push the boundaries of what was thought possible in OSRS. He consistently set records in various activities, such as completing quests quickly, achieving high scores in competitive modes like Deadman Mode tournaments, and mastering new content shortly after its release.
Beyond his individual achievements, Woox has also contributed significantly to the OSRS community. He regularly shares his knowledge and strategies through guides, videos, and streams, helping players improve their skills and understand game mechanics better. His presence in the community has inspired countless players to strive for excellence and approach the game with creativity and determination.
Woox's impact on OSRS extends beyond his gameplay prowess. He has become a symbol of dedication, innovation, and the limitless possibilities within the game. His influence has shaped how players approach challenges, solve puzzles, and interact with content, leaving a lasting legacy in the annals of RuneScape history.
Today, Woox remains an active member of the OSRS community, continuing to innovate and achieve new milestones. His journey from a dedicated player to a revered icon is a testament to the spirit of adventure and exploration that defines Old School RuneScape, inspiring players to push the boundaries and forge their paths in the world of Gielinor.
-
Cooking is a versatile skill that allows you to prepare various types of food, which can heal you during combat, boost your skills, or be sold for profit. This guide will take you through the journey from level 1 to 99 Cooking, detailing different methods, recipes, and locations to maximize your experience gains efficiently.
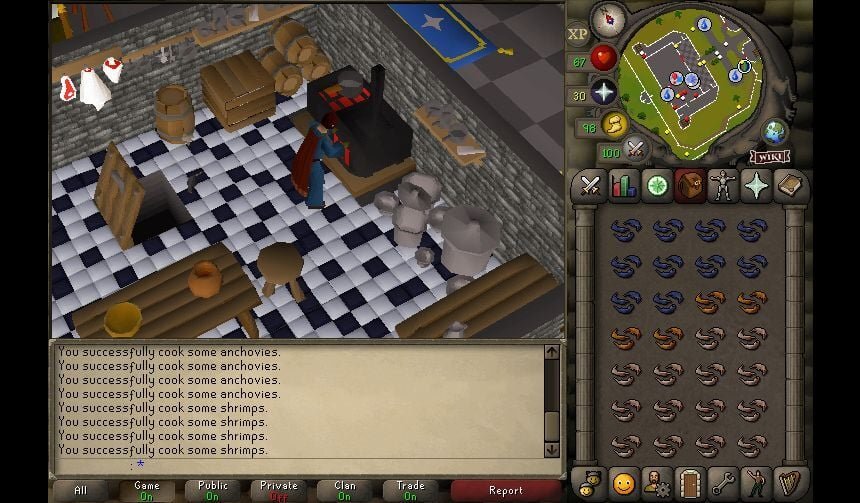
Starting at level 1 Cooking, begin by cooking shrimp or anchovies on a range or fire. These are basic ingredients that can be obtained easily and provide quick experience. Lumbridge is an excellent starting location due to its proximity to fishing spots and ranges. Cook shrimp until you reach level 5 Cooking.
Once you reach level 5, switch to cooking sardines or herring. These fish offer slightly more experience per cook than shrimp or anchovies. You can continue cooking these fish on a range or fire until level 15 Cooking. Consider banking your cooked fish for later use or selling them for additional profit.
From level 15 to 25 Cooking, start cooking trout. Trout can be caught using the Fly Fishing technique, and they offer better experience than previous fish. Cook trout on a range or fire until level 25. If you have access to cooking gauntlets, which reduce the burn rate of food, use them to minimize burning fish and increase your experience rates.
At level 25 Cooking, switch to cooking salmon. Salmon provides more experience per cook than trout and continues to be a cost-effective option. Cook salmon on a range or fire until level 35 Cooking. If you're looking to save time and money, consider using the Hosidius kitchen in Kourend for its reduced burn rate effect.
Once you reach level 35, you can start cooking tuna. Tuna offers even more experience per cook than salmon and remains a popular choice for training Cooking efficiently. Cook tuna on a range or fire until level 50 Cooking. If you prefer a more relaxed approach, consider using the Hosidius kitchen for its reduced burn rate effect.
At level 50 Cooking, you unlock the ability to cook lobster. Lobster provides substantial experience per cook and is a staple food for higher-level players due to its healing properties. Cook lobster on a range or fire until level 75 Cooking. If you're looking to save time and money, consider using the Hosidius kitchen for its reduced burn rate effect.
Once you reach level 75, you can start cooking swordfish. Swordfish provides more experience per cook than lobster and is a valuable food item for combat situations. Cook swordfish on a range or fire until level 80 Cooking. If you're looking to save time and money, consider using the Hosidius kitchen for its reduced burn rate effect.
At level 80 Cooking, you unlock the ability to cook monkfish. Monkfish provides excellent experience per cook and is considered one of the best foods for healing in the game. Cook monkfish on a range or fire until level 90 Cooking. If you're looking to save time and money, consider using the Hosidius kitchen for its reduced burn rate effect.
Once you reach level 90, you can start cooking sharks. Sharks provide the highest experience per cook and are highly sought after for their healing properties. Cook sharks on a range or fire until level 99 Cooking. If you're looking to save time and money, consider using the Hosidius kitchen for its reduced burn rate effect.
Throughout your journey to level 99 Cooking, consider participating in activities such as the Cooking Guild, which offers a range of benefits including access to the range of ranges, which is an effective place to train.
-
Training Magic is a rewarding journey that offers numerous spells and capabilities that can enhance your overall gameplay experience. Starting at level 1 Magic, your goal is to get a basic understanding of how spells work. The first spell you’ll be using is Wind Strike. This spell is straightforward and uses air runes and mind runes. Begin by casting Wind Strike on low-level monsters such as chickens, cows, or goblins around Lumbridge. These monsters have low hit points and are plentiful, making them ideal for quick training. As you progress, consider completing the quest "Imp Catcher," which gives you a magic amulet as a reward. This amulet provides a small boost to your Magic level, helping you to cast spells more effectively. Another quest to consider is "Witch's Potion," which gives you 325 Magic experience and will boost you to level 4 or 5.
Once you reach level 19, you can start casting Confuse, a spell that requires water, earth, and body runes. This spell is not used for damage but can be used to gain experience by casting it on low-level monsters like the ones you started with. You can also start casting Curse at level 19, which requires water, earth, and body runes. Cursing enemies provides a good amount of experience per cast, especially when used on enemies with high Magic resistance to avoid the spell succeeding. Alternatively, if you want to keep dealing damage, you can switch to using Water Strike at level 5, Earth Strike at level 9, and Fire Strike at level 13, progressively moving to stronger spells as you gather more runes and experience.
At level 25, you can start casting Varrock Teleport, which is one of the most efficient ways to train Magic early on. This spell requires air, fire, and law runes. Teleporting repeatedly to Varrock provides a fast and consistent method to gain experience. You can continue using teleports like Lumbridge Teleport at level 31 and Falador Teleport at level 37 for even more experience per cast. Keep in mind that teleporting can be costly due to the price of law runes, so it might be wise to buy runes in bulk to save money.
When you reach level 35, it's a good idea to switch to High Level Alchemy (High Alch), a spell unlocked at level 55. Before reaching that point, you can use Low Level Alchemy (Low Alch) at level 21, but the experience rates are significantly lower. High Alch requires nature runes and fire runes and allows you to convert items into gold. This method can be used to not only train Magic but also generate a profit or mitigate the costs of training. Popular items to alch include yew longbows, battlestaves, and other high-value items. Make sure to research items that have minimal loss or even profit margins.
Once you reach level 43, you unlock the Superheat Item spell, which requires nature runes and fire runes. This spell allows you to smelt ores into bars and provides both Magic and Smithing experience. Superheat Item is particularly effective for training if you have a lot of ores to process, as it speeds up the smelting process while simultaneously gaining experience in two skills. Use this method on ores like iron, gold, and mithril for efficient training.
Starting at level 50, you can access the Mage Training Arena, a mini-game located in the Desert. This mini-game offers four different training methods: Telekinetic Theatre, Alchemist's Playground, Enchanting Chamber, and Graveyard. Participating in the Mage Training Arena is an excellent way to gain Magic experience while also earning points that can be spent on valuable rewards such as the Infinity robes and the Mage's Book. The experience rates are decent, and the rewards make it a worthwhile activity, especially if you plan to use Magic extensively.
At level 55, High Level Alchemy becomes available, which is one of the most popular methods for training Magic. As mentioned earlier, this spell requires nature runes and fire runes and allows you to convert items into gold. High Alch provides a significant amount of experience per cast and can be used to generate profit or mitigate training costs. You can alch various items such as yew longbows, battlestaves, and rune items. Buying items in bulk and monitoring the Grand Exchange for good deals is crucial to maximize your profit margins.
Once you reach level 66, you unlock the ability to cast the Magic Imbue spell from the Lunar Spellbook. This spell allows you to create combination runes without needing talismans, which can be particularly useful if you plan to train Runecrafting alongside Magic. The Lunar Spellbook also offers other useful spells for training, such as Humidify at level 68, which fills water containers and can be used to train Magic and make money by filling vials, jugs, or other containers with water.
From level 75 onwards, you can start using the Trident of the Seas and Trident of the Swamp for combat training. These weapons are unique because their special attack casts a spell that scales with your Magic level, providing consistent and high experience rates. Training with the Trident is particularly effective against monsters with high hit points, such as those found in Slayer tasks. This method is also profitable, as the Tridents have a chance to drop valuable loot.
At level 80, you unlock Stun, which can be used in combination with the Charge spell (unlocked at level 80) for efficient training. Casting Stun on monsters with high Magic resistance ensures that the spell fails and you gain maximum experience without affecting the monster's stats. This method is often paired with splashing, a technique where you wear armor that provides negative Magic bonuses to ensure your spells fail. Alternatively, using the Charge spell in combination with God Spells in the Mage Arena can provide high experience rates.
Reaching level 85 allows you to cast Teleport to House, which is a quick and convenient way to teleport to your player-owned house. If you have your house set up with a lectern, you can make teleport tablets for various locations, providing a steady income while gaining Magic experience. Crafting and selling teleport tablets can be an efficient way to train Magic while generating profit, especially if you have access to the necessary materials and a well-furnished house.
From level 90 onwards, you can start using Ice Barrage, the most powerful spell in the Ancient Spellbook. This spell requires blood and death runes and is highly effective for training Magic in multi-combat areas, such as the Monkey Madness II tunnels or during Slayer tasks. Ice Barrage can hit multiple targets simultaneously, providing extremely high experience rates. This method is costly due to the price of runes but offers unparalleled experience gains.
At level 94, you unlock Vengeance, a powerful spell from the Lunar Spellbook that can reflect damage back to attackers. This spell is not used for training Magic directly but is highly valuable for PvM (Player versus Monster) and PvP (Player versus Player) scenarios. Vengeance can significantly enhance your combat effectiveness, making it a valuable addition to your spellbook.
From level 95 onwards, you can start using the Spellbook Swap spell from the Lunar Spellbook. This spell allows you to temporarily switch to another spellbook, providing incredible versatility for training and combat. Spellbook Swap is particularly useful for high-level players who need to switch between different types of magic for various activities.
Reaching level 99 in Magic is a prestigious achievement that grants access to the Magic Skillcape, which provides various benefits such as unlimited teleports to the Magic Guild and a slight boost to your Magic defense. The journey to 99 involves a balanced approach of utilizing the best spells available, managing your rune supply efficiently, and taking advantage of various training methods and mini-games. By carefully planning your training, using the best methods and tools, and taking advantage of experience-boosting items and quests, you can achieve mastery in Magic efficiently and enjoyably.
Throughout your training, consider participating in activities like the Mage Training Arena, Pest Control, and other mini-games that provide both experience and rewards. Completing quests that offer Magic experience, such as "Desert Treasure," "Lunar Diplomacy," and "Dream Mentor," can also significantly boost your progress. Additionally, using experience-boosting items such as the Wise Old Man's Santa hat or the Abyssal bracelet can further enhance your training efficiency.
-
*idol (lol not idle) MISSPELLING, SORRY!
-
Someday, I will be the top poster, the #1 member. I will overcome the advertising bots! The forum will have me on the leaderboard! Somebody actually making OSRS content on this forum! Just watch. This forum will be revived.
-
Probably the coolest guy ever back then.
-
Starting out in Construction, it's essential to understand the basics and efficient methods to gain experience quickly. Begin by building and upgrading your player-owned house (POH) in Rimmington. At level 1, you can construct crude wooden chairs using planks and nails in the parlour of your house. Each chair provides a small amount of experience, but it's a good start to get familiar with the mechanics. Bring a saw, hammer, and plenty of planks and nails to minimize interruptions.
From levels 1 to 19, continue building crude wooden chairs until you can construct wooden bookcases at level 4. Once you reach level 19, switch to building oak chairs using oak planks in the dining room. Oak planks are more efficient and provide better experience rates than regular planks. This method will quickly carry you through to level 33. At this stage, consider completing the "Daddy's Home" miniquest for additional Construction experience and useful rewards.
Reaching level 33 allows you to start building oak larders in the kitchen. Oak larders offer one of the best experience rates for mid-level Construction training. Ensure you have a butler or demon butler to fetch oak planks from the bank to your house, significantly speeding up the process. Continue building oak larders until level 52. This method is efficient and provides consistent experience.
At level 52, you can switch to building mahogany tables using mahogany planks. These provide a substantial increase in experience per plank compared to oak larders. Ensure you use a demon butler to fetch planks to maximize your efficiency. Mahogany tables are a significant investment but offer some of the best experience rates in the game. Continue this method until level 74.
Once you reach level 74, you can construct oak dungeon doors. Oak dungeon doors provide excellent experience rates and are more cost-effective compared to mahogany tables. Set up a dungeon room in your POH and have your demon butler bring oak planks. Build and remove the doors repeatedly for efficient training. This method is highly effective and can be used until level 99 if you prefer a more cost-efficient approach.
From level 83, if you have the funds and want faster experience, you can switch to building gilded mahogany benches in the dining room. These offer higher experience per build but are significantly more expensive. Use a demon butler to fetch the mahogany planks and construct benches repeatedly. This method is the fastest way to train Construction but requires a substantial investment.
Reaching level 99 in Construction is a prestigious achievement that grants access to the Construction Skillcape, which provides various benefits such as a free teleport to your house. The journey to 99 involves a balanced approach of utilizing the best furniture available, managing your butler efficiently, and investing in planks wisely. By carefully planning your training, using the best methods and tools, and taking advantage of experience-boosting items and quests, you can achieve mastery in Construction efficiently and enjoyably.
Remember to periodically participate in activities like the Mahogany Homes minigame for a change of pace and some additional rewards. This minigame involves renovating NPC houses across Gielinor and offers a good balance of experience and profit, along with useful items like the Carpenter's Outfit, which boosts your Construction experience gains when worn.
-
Starting out in Agility, it's crucial to familiarize yourself with the various courses and mechanics that will help you gain experience efficiently. At level 1, you should begin with the Gnome Stronghold Agility Course. This course is straightforward and safe, offering a good amount of experience for beginners. Completing laps here will quickly get you from level 1 to 10, allowing you to progress to more advanced courses. Aim to complete the “Tree Gnome Village” quest early, as it provides some useful teleports near the Gnome Stronghold.
From levels 10 to 20, transition to the Draynor Village Rooftop Course. Rooftop courses offer the added benefit of Mark of Grace spawns, which can be collected and used to purchase the Graceful outfit, a crucial set for reducing run energy depletion. The Draynor course is efficient for these early levels and provides steady experience. Be sure to collect any Marks of Grace you see, as you’ll need them later for the Graceful set.
At level 20, move on to the Al Kharid Rooftop Course. This course offers slightly better experience rates and continues to yield Marks of Grace. Al Kharid’s course is a bit more challenging but prepares you for the longer and more complex courses to come. This phase will carry you through to level 30. Keep an eye on your run energy and bring some energy potions or food if necessary to maintain your efficiency.
Once you reach level 30, switch to the Varrock Rooftop Course. This is one of the more popular courses for mid-level agility training due to its balanced experience rates and frequent Marks of Grace spawns. It’s beneficial to train here until level 40, as the experience is decent and the Marks of Grace collected will be helpful for purchasing the Graceful outfit. Additionally, consider completing the “Recruitment Drive” quest for some Agility experience and useful rewards.
At level 40, head to the Canifis Rooftop Course, which offers higher experience rates and an excellent number of Marks of Grace. This course is ideal for training up to level 50. The layout of the Canifis course is straightforward, making it easy to maintain a steady rhythm and minimize downtime. This is also a good time to start using the Agility Pyramid in the Kharidian Desert if you want a change of pace and some monetary reward alongside experience.
Reaching level 50 unlocks the Falador Rooftop Course. This course offers good experience rates and continues to provide Marks of Grace. Training here is efficient and prepares you for the more challenging courses ahead. At this stage, you should also focus on completing the “Rag and Bone Man” questline and “Mourning’s End Part I” for additional Agility experience and access to future training areas.
From level 60 to 70, switch to the Seers’ Village Rooftop Course. This course is one of the best for mid to high-level agility training due to its excellent experience rates and the consistent Marks of Grace spawns. Make sure to complete the “Hard Kandarin Diary,” which, once done, allows you to teleport directly to the Seers’ course with the Camelot teleport spell, significantly improving your training efficiency.
At level 70, move on to the Rellekka Rooftop Course. This course offers higher experience rates and continues to yield Marks of Grace. Training here will prepare you for the final stretch to level 99. Additionally, completing the “Fremennik Trials” and “Fremennik Isles” quests can be beneficial for the teleport options and rewards they provide. If you need a break from rooftop courses, consider trying the Agility Pyramid for a change of pace and some additional gold.
Reaching level 80 allows you to train at the Ardougne Rooftop Course, one of the best places for high-level agility training. The experience rates here are excellent, and you continue to collect Marks of Grace. Additionally, completing the “Hard Ardougne Diary” will boost your experience gains at this course, making it even more efficient. Training here will be your primary method until level 90.
From level 90 to 99, you can continue training at the Ardougne Rooftop Course or switch to the more challenging courses like the Ape Atoll Agility Course (after completing “Monkey Madness II”) or the Hallowed Sepulchre, which offers both high experience rates and valuable rewards. The Hallowed Sepulchre, in particular, is a great option if you enjoy a more engaging and profitable training method.
Reaching level 99 in Agility is a significant achievement that grants access to the Agility Skillcape, which provides various benefits such as reduced run energy depletion. The journey to 99 involves a balanced approach of utilizing the best courses available, collecting Marks of Grace for the Graceful outfit, and completing relevant quests to maximize your experience gains. By carefully managing your training routine, using the best equipment and methods, and taking advantage of experience-boosting items and diary rewards, you can achieve mastery in Agility efficiently and enjoyably.
-
Starting out in Hunter, it's essential to get familiar with the basics and various methods for efficiently gaining experience. At level 1, you should begin by catching Crimson Swifts in the Feldip Hunter area, south of Yanille. Use bird snares to trap these birds, which provide a good amount of experience for the early levels. Make sure to bring plenty of snares, as they can break frequently. This method will quickly get you from level 1 to 9, allowing you to progress to the next tier of creatures.
From levels 9 to 19, you should transition to catching Copper Longtails in the same area. Continue using bird snares and move to different spots if necessary to find an abundance of birds. This method will help you gain steady experience and prepare you for more challenging catches. At this stage, completing the quest "The Ascent of Arceuus" is beneficial, as it grants experience and access to new hunting areas.
Once you reach level 19, switch to catching Tropical Wagtails in the Jungle Hunting Area, which can be found south of Feldip Hills. Continue using bird snares, and you’ll notice a significant increase in experience per catch. Make sure to set up multiple snares to maximize your experience per hour. Additionally, consider completing the "Eagle's Peak" quest around this time, as it unlocks box traps, which are essential for future training.
At level 29, you can start catching Swamp Lizards using net traps in the Canifis Hunter area. This method provides a good balance of experience and is relatively straightforward. Bring a few nets and ropes, and set up traps near the swamp lizard spawns. Swamp Lizards can be caught until level 43, providing consistent experience. Using the bonecrusher and prayer gear to maintain your prayer points can be beneficial here if you choose to bury bones dropped by the creatures you hunt.
Reaching level 43 allows you to catch Spotted Kebbits in the Piscatoris Hunter area. Use deadfall traps to catch these kebbits, which offer better experience rates. Make sure to bring logs and a knife to set up the traps. Additionally, consider catching Orange Salamanders in the desert using net traps as an alternative method for similar experience rates. These methods will efficiently carry you through to level 53.
From level 53 to 63, you should focus on catching Chinchompas in the Piscatoris Hunter area. Grey Chinchompas are a popular choice due to their excellent experience rates and market value. Use box traps to catch them, and set up multiple traps in areas with high chinchompa density. This method is highly effective and can be profitable as well. Completing the "Monkey Madness II" quest around this time unlocks the ability to catch maniacal monkeys, which can provide substantial experience later on.
At level 63, red chinchompas become available in the Feldip Hills. This is one of the most efficient methods for gaining Hunter experience and making a significant profit. Use box traps to catch red chinchompas, and set up traps in areas with high density. Ensure you have plenty of box traps and replace broken ones immediately to maintain maximum efficiency. This method can be used up to level 80 and beyond, providing excellent experience and profit.
Reaching level 80 opens up the ability to catch Herbiboars on Fossil Island. This method not only provides great experience but also yields valuable herbs, fossils, and other resources. To catch Herbiboars, you’ll need to track their footprints and use your hunter skills to uncover them. This method is less AFK but offers some of the best experience rates in the game. Additionally, completing the "Bone Voyage" quest is necessary to access Fossil Island.
From level 80 to 99, catching Red Chinchompas remains an effective method if you prefer a more AFK approach with consistent profit. Alternatively, you can continue catching Herbiboars for excellent experience and valuable drops. Another viable option at level 77 is to hunt Maniacal Monkeys on Ape Atoll, unlocked through "Monkey Madness II." This method provides very high experience rates and can be extremely efficient with the right setup.
Reaching level 99 Hunter is a significant achievement that grants access to the Hunter Skillcape, which provides various benefits such as an increased chance of successfully catching creatures. The journey to 99 involves a balanced approach of utilizing the best hunting methods available, maximizing your equipment, and staying consistent with your training routines. By carefully managing your traps, using the best tools and methods, and taking advantage of quests and areas that boost your experience rates, you can achieve mastery in Hunter efficiently and enjoyably.

.jpg.2d88451fd18855788dc84fc444cb371c.jpg)
.jpg.29f084a64f127940f8f4baf8dda78bb1.jpg)
.jpg.37364650c8d129409ed2ea7f1e236e9b.jpg)
.jpg.7194c15c3e70bb29cdec1bdece44005c.jpg)

.jpg.0cf8563587e52290e9945fa8f0249423.jpg)
.jpg.65f665d85a277e8b9318ec869d9d65df.jpg)
.jpg.ec8a436483c1af22fb4a65a9196f4f6b.jpg)
"Children of the Sun" Quest Guide
in Questing
Posted
"Children of the Sun" is a rather new quest in Old School RuneScape, released in January 2024. It starts in Varrock, where a delegation from Varlamore arrives to sign a treaty with Misthalin. Players must investigate suspicious activities surrounding the event. Completing the quest rewards one quest point and access to the upcoming Varlamore area. The quest is available to subscribers only and sets the stage for the Varlamore storyline and future updates to the region.
To complete "Children of the Sun," start by speaking to the Varlamore delegation in Varrock. Investigate the nearby area to gather clues about the suspicious activities. Follow the leads that point you towards different NPCs and locations in Varrock. Solve the puzzles and confront the hidden enemies behind the disturbances. Report your findings back to the Varlamore delegation. Complete any additional tasks they require to secure the treaty between Varlamore and Misthalin. Upon completion, you will receive one quest point and access to the upcoming Varlamore area.